The first time I tried a classic beef pot pie, the filling turned out watery and the crust soggy — frustrating when you want a hearty dinner on a weeknight. This beef pot pie fixes that by concentrating the stew on the stove, using a simple cornstarch slurry for a glossy, spoonable filling, and finishing under a store-bought puff pastry lid so you get flaky crust without an afternoon in the kitchen. If you want a dependable, efficient pot pie that still tastes like homemade, this one delivers.
Why this beef pot pie works
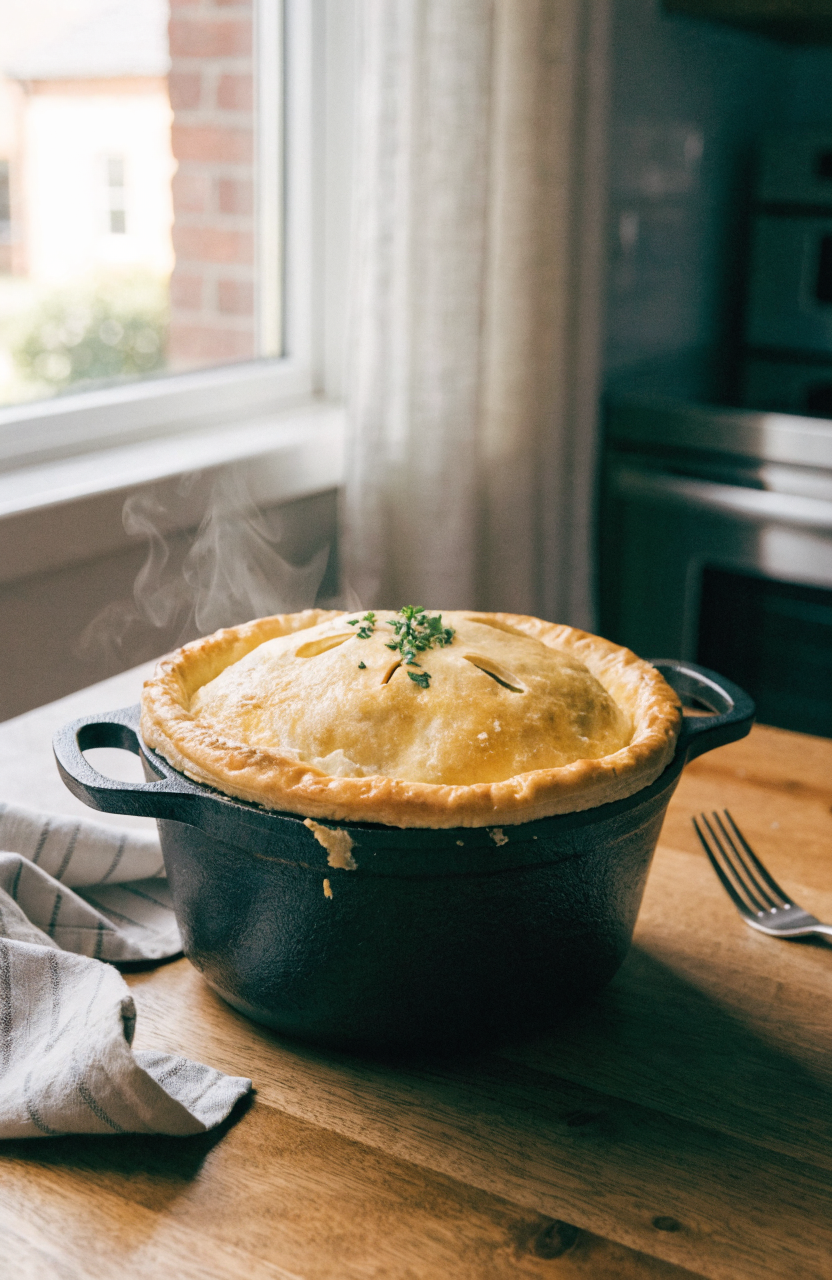
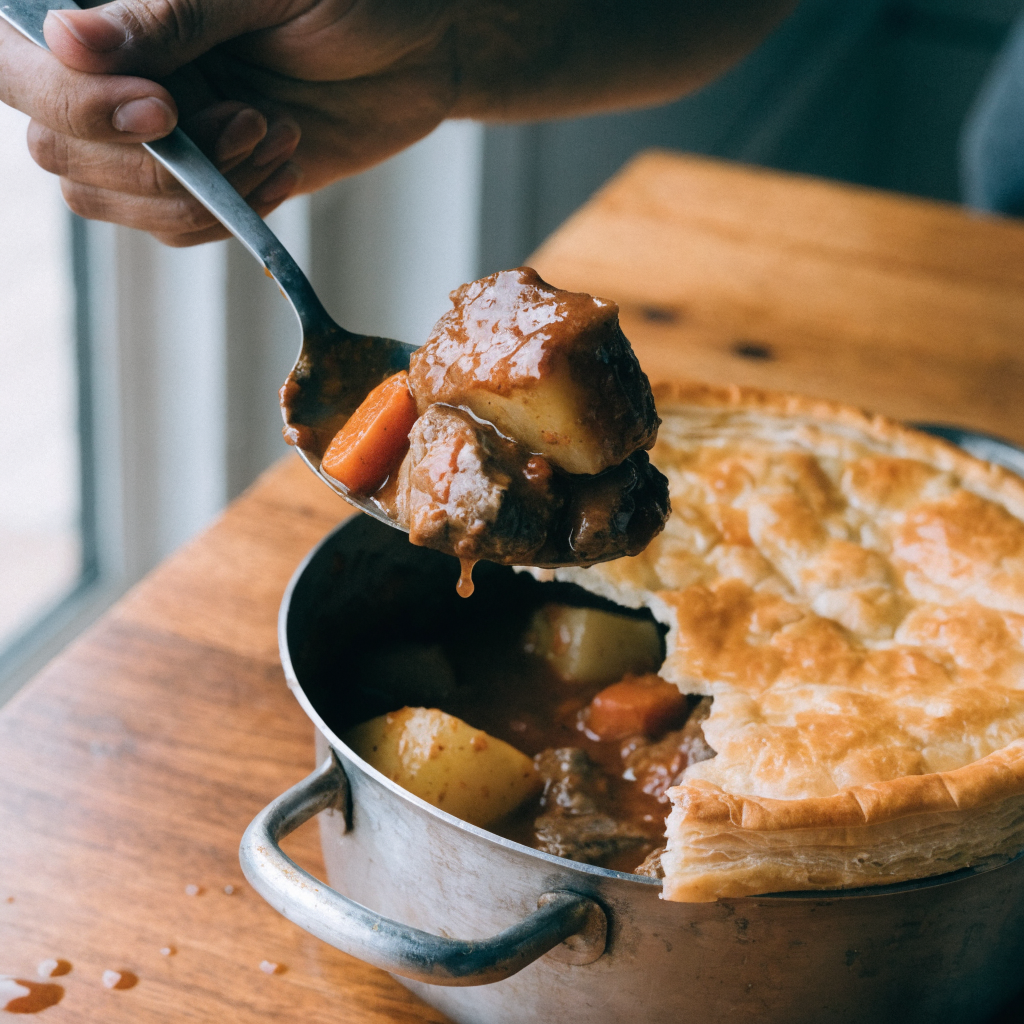
This version leans on two practical ideas that make the recipe reliable for busy home cooks. First, the filling is cooked and reduced on the stovetop until the beef and vegetables are deeply flavored and the liquid is reduced by roughly a third before any thickener is added; that prevents the common watery pot-pie problem that ruins the crust. Second, instead of a time-consuming scratch pastry, I use a single sheet of frozen puff pastry as a lid (no rolling, minimal handling), baked directly over the stew in an ovenproof skillet or Dutch oven. The result is a rich, fork-tender beef filling with a crisp, flaky top that stands up to reheating.
During testing I arrived at a roughly 3:2 ratio of cooked filling volume to pastry area that keeps the crust from sliding off or sinking into the stew. I also found that adding the slurry off high heat and returning the pot to a brief simmer prevents breaking or a gummy texture. These small technical choices — reduction, timed slurry, and a pre-baked edge-seal brush of egg — are what make this beef pot pie come together every time.
Key takeaways
- Cook and reduce the filling before thickening to avoid a soggy crust.
- Use a cornstarch slurry added off high heat for a glossy, stable filling.
- Store-bought puff pastry saves time and still gives a crisp, layered top when baked on the pot.
Ingredients you’ll need and what to substitute
You only need a handful of pantry-friendly ingredients and one baking shortcut to keep this beef pot pie efficient. I use chuck roast cut into 1-inch cubes because the connective tissue melts into the sauce during long simmering and keeps the meat tender without drying out. Carrots, onions, and celery provide classic pot-pie flavor; small new potatoes hold their shape better than russets. Beef broth is the liquid base; if you only have low-sodium, taste and adjust salt at the end. For the crust, a single sheet of thawed puff pastry works best — it covers the pot in one pass and bakes into a reliably flaky lid.
Substitutions: If you prefer short on potatoes, swap an additional cup of diced carrots or parsnips and reduce simmer time by 5–10 minutes. If chuck is unavailable, use beef stew meat but check for excessive fat or connective tissue bits; trim as needed. For a gluten-free option, use a refrigerated gluten-free pie crust and adjust bake temps and times according to package guidance, but note that I haven’t tested that version. For a dairy note, a tablespoon of butter added at the end brightens the filling, but it’s optional.
Equipment
Essential equipment keeps this streamlined: an ovenproof 4-to-6-quart Dutch oven or heavy skillet for stovetop cooking and transfer to the oven, a wooden spoon, a small bowl for the slurry, a pastry brush for egg wash (optional), and a rimmed baking sheet to catch any drips. If you don’t have an ovenproof skillet, transfer the filling to a 9-inch deep-dish pie plate or a 2-quart casserole dish and bake with the puff pastry on top. A kitchen thermometer is handy for checking beef doneness but not required.
How to make beef pot pie
1. Brown the beef and build flavor
Pat 1 1/2 pounds of chuck roast, cut into 1-inch cubes, dry with paper towels and season with salt and pepper. Heat 2 tablespoons of vegetable oil in a 5-quart Dutch oven over medium-high heat until shimmering. Work in two batches so pieces don’t steam: sear until well-browned on all sides, 4–5 minutes per batch, and remove to a plate. Browning adds real depth to the filling, so resist the urge to skip this step even if you’re pressed for time.
2. Sweat the aromatics and deglaze
Reduce heat to medium, add 1 large diced onion, 2 diced celery ribs, and 2 medium diced carrots with a pinch of salt. Cook until the vegetables are soft and the onions are translucent, about 6–8 minutes. Add 3 minced garlic cloves and cook 1 minute. Pour in 2 tablespoons tomato paste and stir for 1 minute to remove the raw edge. Deglaze with 1 cup low-sodium beef broth, scraping the browned bits from the bottom of the pot.
3. Simmer and reduce the stew
Return the browned beef and any accumulated juices to the pot. Add 2 cups additional beef broth (for a total of 3 cups counting the deglaze), 1 tablespoon Worcestershire sauce, 1 teaspoon dried thyme, 1 bay leaf, and 2 cups small diced new potatoes. Bring to a simmer, then reduce heat to low, cover partially, and simmer gently until the beef is fork-tender and the liquid has reduced by about one-third, roughly 60–75 minutes depending on the cut. Stir occasionally and skim any excess fat from the surface.
4. Final seasoning and thickening
With the stew simmering and concentrated, remove and discard the bay leaf. In a small bowl whisk 2 tablespoons cornstarch with 3 tablespoons cold water to make a smooth slurry. Turn the heat off and stir a splash of the hot liquid into the slurry to temper it, then pour the tempered slurry into the pot while stirring. Return the pot to low heat and simmer for 2–3 minutes until the sauce glazes and thickens; it should coat the back of a spoon without feeling starchy. Taste and adjust salt and pepper. If the filling seems too thick after cooling, add a tablespoon of broth and stir.
5. Top with puff pastry and bake
Preheat the oven to 400°F. Roll a sheet of thawed puff pastry to smooth any creases and lay it over the stew, tucking edges inside the pot or trimming to fit with a 1/2-inch overhang. Brush the pastry with a beaten egg mixed with 1 teaspoon water for a glossy finish, and cut a few slits to vent steam. Place the Dutch oven on a rimmed baking sheet and bake for 20–25 minutes until the pastry is puffed and golden brown. If edges brown too quickly, tent loosely with foil for the final 5 minutes. Let the pot pie rest 10 minutes before serving so the filling sets slightly.
Things I learned the hard way
- First mistake: I added the slurry while the pot was at a full boil and ended up with a stringy, gluey sauce. Fix: temper the slurry and add it off high heat, then return to a gentle simmer for just a few minutes.
- If you skip browning the beef to save time, the filling tastes flatter; don’t skip it unless you’re using a pre-browned stew meat and willing to add extra seasoning.
- Overcrowding the pan when searing causes steaming and pale meat — brown in batches for better flavor.
- Using too much liquid at the start means a soggy crust; reduce the stew uncovered until it’s noticeably thicker before baking.
- Thaw puff pastry fully but keep it cool; if it gets too warm it’s hard to handle and won’t puff properly in the oven.
Variations to try
- Shortcrust top: Swap puff pastry for a pre-made refrigerated pie crust; dock the crust and bake 25–30 minutes — texture will be denser, and edges may brown faster, so watch closely.
- Cheesy finish: Sprinkle 1/2 cup shredded sharp cheddar on the filling just before topping with pastry; the cheese adds richness and helps the pastry adhere.
- Mushroom boost: Add 8 ounces sliced cremini mushrooms sautéed with the aromatics; reduce simmer time by 5 minutes to account for extra moisture from mushrooms.
- Mini pot pies: Divide the filling into six 10-ounce ramekins, top with 6-inch pastry circles, and bake 12–15 minutes; adjust resting time to 5 minutes.
Storage, freezing, and reheating
Refrigerate cooled leftovers in an airtight container for up to 3 days. To reheat single servings, place on an oven-safe plate and warm at 350°F for 12–15 minutes until the filling is bubbly and the crust regains crispness; a microwave will reheat faster but soften the crust. You can freeze the filling (without pastry) for up to 3 months: cool completely, portion into freezer containers, and seal tightly. Thaw overnight in the fridge, reheat gently on the stove, then top with fresh puff pastry and bake as directed. I do not recommend freezing the assembled pie with puff pastry, as thawing tends to make the crust soggy.
What to serve with beef pot pie
This hearty pie pairs well with lighter sides that add brightness and texture. Try a simple green salad with lemon vinaigrette, roasted Brussels sprouts, or a crisp coleslaw to cut the richness. For extra comfort on chilly nights, a side of buttery green beans or a plain baked sweet potato works nicely.
Stovetop-Reduced Beef Pot Pie with Puff Pastry Lid
Ingredients
Equipment
Method
- Preheat oven to 400°F. Pat beef cubes dry and season with salt and pepper.
- Heat 2 tablespoons oil in a 5-quart Dutch oven over medium-high heat; brown beef in batches 4–5 minutes per batch and transfer to a plate.
- Reduce heat to medium, add onion, celery, and carrots with a pinch of salt and cook 6–8 minutes; add garlic and cook 1 minute, then stir in tomato paste and cook 1 minute. Pour in 1 cup broth to deglaze, scraping browned bits.
- Return beef to the pot; add remaining 2 cups broth, Worcestershire sauce, thyme, bay leaf, and potatoes. Bring to a simmer, reduce heat to low, cover partially, and simmer gently 60–75 minutes until beef is fork-tender and liquid has reduced by about one-third.
- Remove bay leaf. Whisk 2 tablespoons cornstarch with 3 tablespoons cold water to make a slurry, temper with a splash of hot liquid, stir into the pot off high heat, then simmer 2–3 minutes until sauce thickens and coats a spoon.
- Smooth the filling, taste and adjust seasoning. Lay thawed puff pastry over the pot, tuck or trim edges, brush with egg wash if using, cut vents, place on a rimmed baking sheet and bake 20–25 minutes until pastry is golden. Let rest 10 minutes before serving.
Notes
Frequently asked questions
Can I use leftover roast beef for this pot pie? Yes — leftover roast beef works fine; dice it and shorten the simmer to 10–15 minutes just to meld flavors, then thicken and bake as directed. Avoid overcooking pre-cooked meat.
Why is my pot pie filling watery after baking? Usually because the filling wasn’t reduced enough before thickening. Reduce the stew uncovered until the liquid is concentrated, and add a cornstarch slurry off high heat to reach the right consistency before topping.
Can I make this without puff pastry? You can use a refrigerated pie crust or biscuit topping; both change the texture and may require small timing adjustments — biscuits typically need about 20-25 minutes at 400°F, while a pie crust is similar to pastry timing but less flaky.
How do I keep the pastry from burning before the filling is hot? Preheat the oven fully to 400°F and bake the assembled pie on the middle rack. If the edges brown too quickly, tent with foil for the last 5-10 minutes.
Is this recipe freezer-friendly? The filling freezes well for up to 3 months if cooled and stored properly; assemble and bake from thawed filling for best results. Avoid freezing the fully assembled pie with pastry.
Closing
This beef pot pie gives you a concentrated, spoonable beef stew finished with a quick puff pastry lid so you get real flavor without a long pastry day — a practical weeknight-friendly approach to a classic pot pie that yields a reliable, comforting result. Serve with a bright green salad or roasted vegetables to balance the richness, and store cooled filling separately if you plan to freeze for later so the pastry stays crisp when baked fresh.

Leave a Reply