When I needed a centerpiece for a last-minute 4th of July potluck, I built an American flag snack tray that looked festive without taking all afternoon—my focus was speed and a crisp finish. The American flag snack tray uses fresh red, white, and blue ingredients arranged in a simple grid so you can assemble in stages, keep fruit from getting soggy, and finish with crunchy accents in under an hour. If you want a patriotic platter that travels well and survives a hot day outside, this method is what I use.
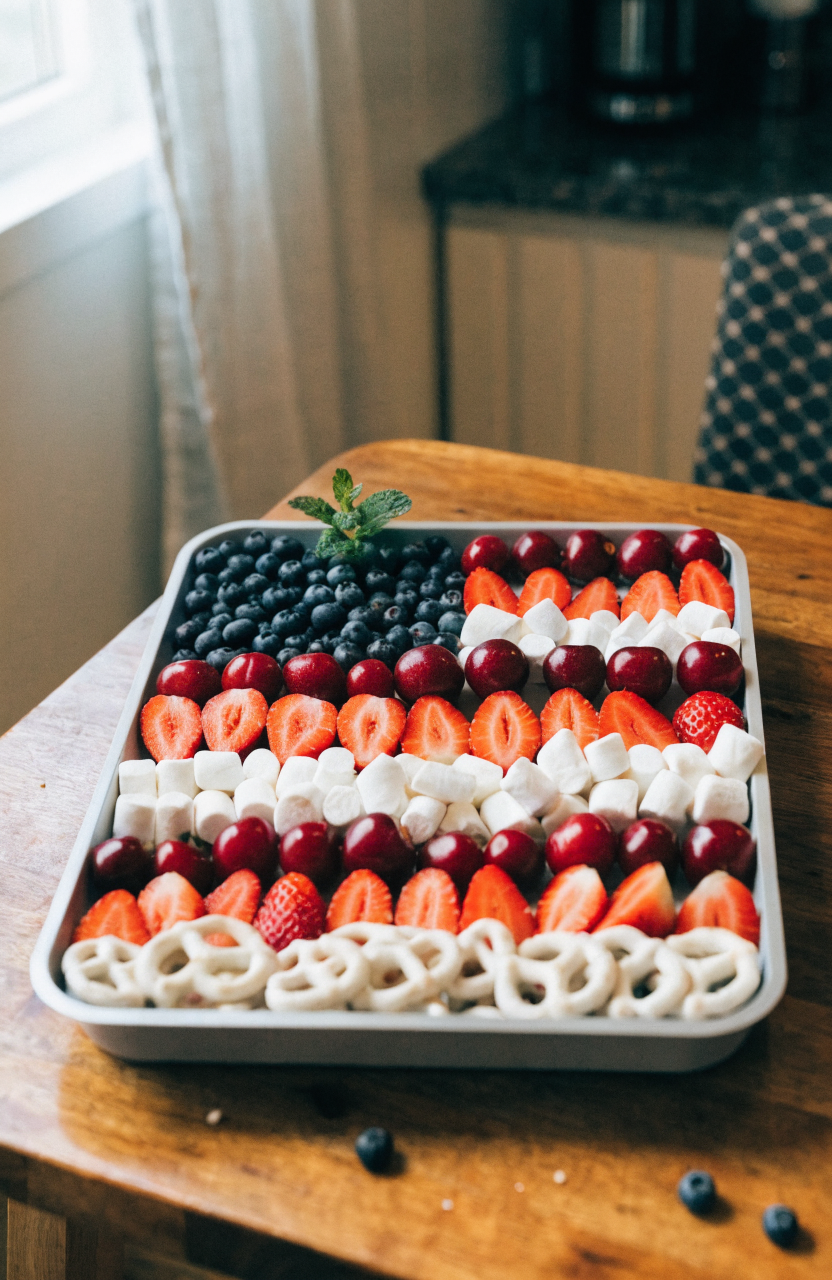
Why this American flag snack tray works
The trick with a patriotic fruit platter is balancing visual impact with practical handling. The key technique here is an assembly-first approach: lay out the solid white base and blue canton first, then fill the red stripes, and add crunchy white accents last to keep everything textured and tidy. I tested a few layouts and found that arranging soft fruits (strawberries, cherries) in slightly thicker rows and placing blueberries in a shallow, contained section prevents the berries from rolling and bruising. Another important ratio I settled on is roughly twice as many red fruit pieces as blue ones by volume; it keeps the stripes bold without overcrowding the blue canton.
What changed during testing: my first version used only halved strawberries and a scattering of blueberries, and after sitting for 30 minutes the center strawberries released juice and the white elements looked damp. The fix was to pat the berries dry, line the tray with a thin paper towel under the white base (hidden), and place the yogurt-covered pretzels and marshmallows on top right before serving. The final approach is faster because you can prepare components in parallel—wash fruit while chilling yogurt pretzels—and it travels better because crunchy elements stay crisp on top.
Key takeaways
- Assemble the flag in stages to prevent sogginess and make assembly predictable.
- Prep fruit with a salad spinner or kitchen towel and arrange the crunchy white accents last.
- Use a shallow rimmed tray or cutting board and a contained blue canton to keep blueberries from rolling off.
Ingredients you’ll need and what to substitute
This tray relies on fresh, colorful produce plus a couple of simple white accents. I use strawberries and cherries for bright red rows because they hold shape well when cut; blueberries fill the canton because they’re small and naturally blue. For the white stripes you’ll want a mix of yogurt-covered pretzels (for crunch) and mini marshmallows (for softness). If you prefer all-fresh fruit, use thin-sliced pears or apple slices treated with lemon water for the white rows, but expect a different texture and the need for immediate serving to avoid browning.
Substitutions:
- If strawberries are pricey, use sliced red grapes or pitted cherries; grapes are less juicy after slicing and last longer at room temperature.
- Instead of yogurt-covered pretzels, use small vanilla cookies or lightly salted crackers—watch salt if you prefer sweeter contrasts.
- For a mostly fruit tray (no packaged snacks), use peeled Asian pear or thin honeydew slices for the white stripes and freeze-dried yogurt bites for crunch; this changes moisture levels so assemble closer to serving time.
Important handling notes: pat all berries dry; hull and halve strawberries; pit cherries if using fresh cherries and halve them. If you use frozen blueberries, thaw fully and drain; fresh is best.
Equipment
- Large rimmed sheet pan or a 16×12-inch serving tray (a flat cutting board works in a pinch)
- Mixing bowl and salad spinner or clean kitchen towels for drying fruit
- Small offset spatula or butter knife for nudging fruit into tidy rows
- Optional: small silicone baking cup or 3×3-inch square mold to define the blue canton
How to make the American flag snack tray
1. Plan and prep (10–20 minutes)
Pick a tray with a shallow rim so fruit won’t slide off. Decide how big you want the blue canton: a small 3×3-inch square in the upper-left works well on a 16×12 tray and leaves room for six red stripes. Rinse all fruit under cold water and spin or towel-dry thoroughly. Hull strawberries and halve lengthwise; pit and halve cherries; leave blueberries whole. Chill the yogurt-covered pretzels on a paper-towel-lined plate so they stay crisp.
2. Build the white base and canton (5–10 minutes)
Lay down a thin, single layer of plain, unflavored yogurt-covered pretzel pieces or place a narrow row of mini marshmallows where the white stripes will go. This creates the visual white stripe while keeping the moisture barrier between juicy fruit and crunchy bits. Next, position a small square mold at the top-left corner to mark the blue canton if you’re using one.
3. Fill the blue canton (5–10 minutes)
Pack blueberries into the canton area so they form a dense square. If the blueberries are small and loose, press them gently into a single even layer; you can overlap slightly but avoid piling high. The idea is a contained block of blue that visually contrasts with the red stripes.
4. Lay the red stripes (10–15 minutes)
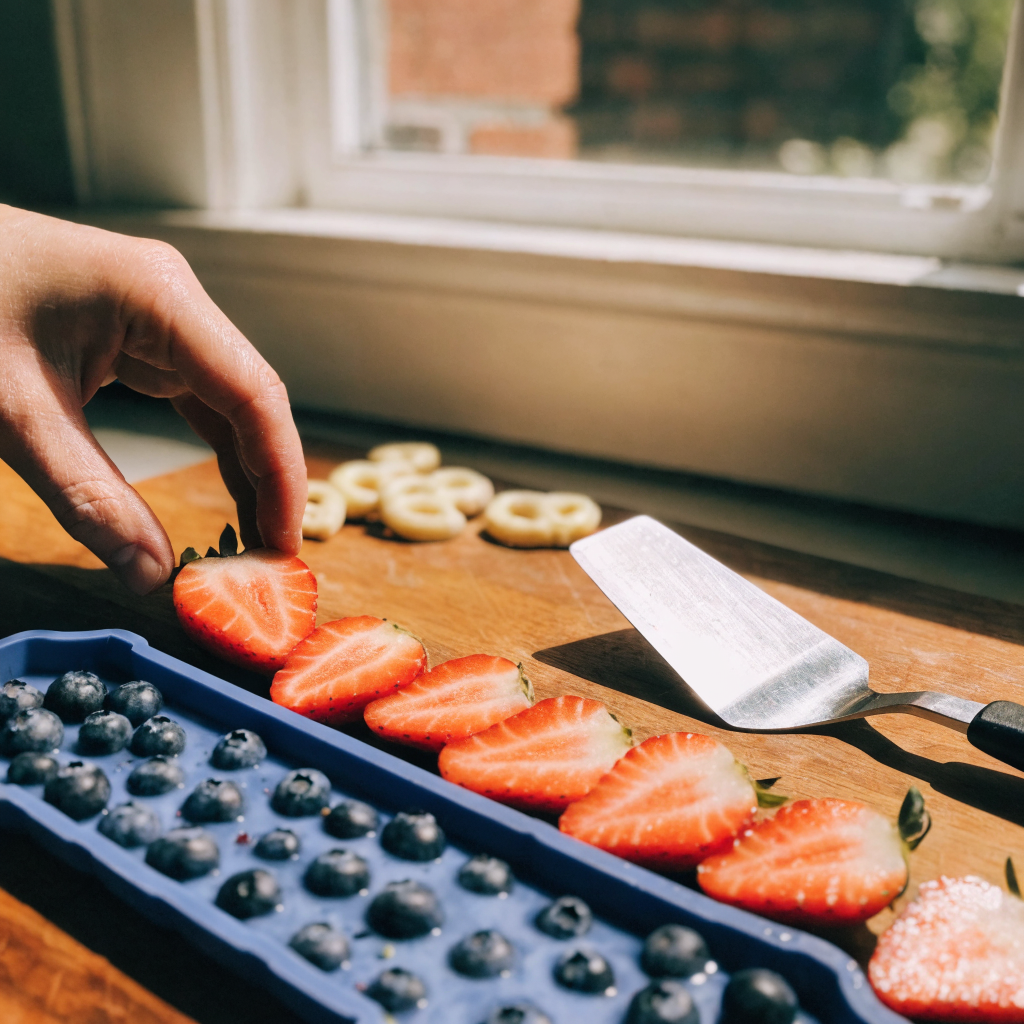
Create horizontal stripes of halved strawberries and cherries across the tray to form the red bands. Start closest to the canton and work outward. For even stripes, place fruit with the cut side down so the flat surface forms a neat edge. Use the offset spatula to nudge pieces into alignment. Aim for 5 or 6 red rows depending on tray size; shorter trays can use stacked rows of halved strawberries to create the stripe effect.
5. Finish with white accents and garnish (2–5 minutes)
Remove the canton mold, if used. Immediately before serving, scatter yogurt-covered pretzels and mini marshmallows over the existing white stripe spaces, and tuck a few pretzels at the edges for extra crunch. Add a sprig or two of fresh mint for color contrast and aroma. If transporting, place the pretzels and marshmallows in a small airtight container and add them to the tray on arrival.
Serving tip: keep the tray on a chilled surface if serving outdoors. A shallow bowl of ice under the tray (with a towel between tray and bowl) helps preserve freshness without making the crunchy elements damp.
Things I learned the hard way
- Don’t place crunchy elements directly under juicy fruit the night before; they soften quickly. Add them last or pack separately.
- Halving strawberries with the hull on makes a neater, less juicy row; my first attempt hulled then quartered them and they released too much juice.
- If blueberries are cold from refrigeration they look firmer and photograph better; leave them chilled until the last moment.
- Placing the blue canton in a shallow silicone cup during assembly prevents accidental spills while you work on the red stripes.
- For travel, secure the tray with plastic wrap and add a thin cardboard spacer above the top of the tray if the garnish is tall; remove wrap before serving to keep pretzels crisp.
- First-time mistake: I once tried to cut all fruit on the tray—too slow and messy. Instead, pre-slice in a bowl and transfer pieces to the tray in small groups.
Variations to try
- All-fruit version: swap yogurt-covered pretzels and marshmallows for thin-sliced pear or apple and freeze-dried yogurt bites; assemble close to serving and serve cold.
- Kid-friendly mix: add small cookie stars or vanilla wafer stars for the white stripes instead of pretzels; place them on top last to avoid sogginess.
- Mini skewers: thread strawberries and small marshmallows on toothpicks to create portable mini-flag bites—reduce tray assembly time but increase prep time for skewers.
- Adult upgrade: include small bowls of honey-yogurt dip and a lemon-mint yogurt sauce on the side; keep sauces separate to avoid softening the platter.
Storage, freezing, and reheating
This snack tray is best eaten the day it’s assembled. Refrigerate leftover fruit in an airtight container for up to 2 days; expect some softening and juice in the bottom of the container. Do not freeze assembled trays—freezing ruins texture and color. If you need a make-ahead plan, wash and dry fruit up to 24 hours in advance and keep components in separate airtight containers in the fridge; assemble the flag within 1 hour of serving. Re-crisp yogurt-covered pretzels by placing them briefly in a 300°F oven for 3–4 minutes if they become slightly soft (watch closely) or simply replace with fresh pretzels.
What to serve with an American flag snack tray
- Grilled chicken sliders or turkey burger sliders for a casual main.
- Cold pasta salad with vinaigrette to balance the sweet fruit.
- Simple cheese board with cheddar and Monterey Jack to add savory contrast.
- Individual hummus cups with veggie sticks for a savory dip option.
- Refreshing lemonade or iced tea pitchers to keep guests hydrated outdoors.
Easy American Flag Snack Tray (Patriotic Fruit Platter)
Ingredients
Equipment
Method
- Rinse all fruit under cold water and dry thoroughly in a salad spinner or on clean kitchen towels; chill blueberries and pretzels briefly while you prep other items.
- Hull and halve strawberries and pit and halve cherries; place each fruit in separate bowls.
- Place a 16×12-inch rimmed tray on a flat surface and, optionally, set a small 3×3-inch silicone mold in the upper-left to define the blue canton.
- Pack blueberries into the canton area in a single even layer, pressing gently so they sit snugly and form a dense block of blue.
- Create horizontal red stripes across the tray by placing halved strawberries (cut side down) and halved cherries in neat rows, starting next to the canton and working outward; use an offset spatula to nudge fruit into tidy lines.
- Place yogurt-covered pretzel pieces and mini marshmallows in the white stripe areas (or keep pretzels separate for travel and add right before serving); tuck mint sprigs around the edges as garnish.
- If you packed pretzels separately, add them to the tray within 10 minutes of serving to maintain crunch.
Notes
Frequently asked questions
Can I make the tray ahead of time? You can prep the fruit up to 24 hours ahead and store each component separately, but assemble the flag within an hour of serving to keep textures fresh. Packing crunchy elements separately is essential to prevent sogginess.
How long does a fruit tray last at a picnic? Keep the tray chilled and out of direct sun; it should be fine for 2–3 hours in warm weather if kept shaded and on a cool surface. For longer events, serve in batches and refrigerate extras.
Can I use frozen fruit? Avoid using frozen fruit assembled on the tray because thawed fruit releases water and softens other items. If you must use frozen, thaw completely, drain, and pat dry before arranging, and serve immediately.
How do I prevent fruit from turning brown? For apple or pear slices used in white stripes, briefly toss in lemon water (1 tablespoon lemon juice to 1 cup water) and keep chilled until serving; assemble close to serving time for best appearance.
What tray should I use? A large rimmed sheet pan or a 16×12-inch serving tray works well; use a cutting board if you don’t have a rimmed tray but be mindful that juices can drip. Use a small silicone mold to define the blue canton if you want crisp edges.
Closing
The American flag snack tray is an easy, attention-grabbing centerpiece that scales to any crowd and suits busy cooks who want a quick, reliable path to a festive platter—just prep smart, assemble in stages, and add crunchy accents at the last minute for best texture and appearance.

Leave a Reply